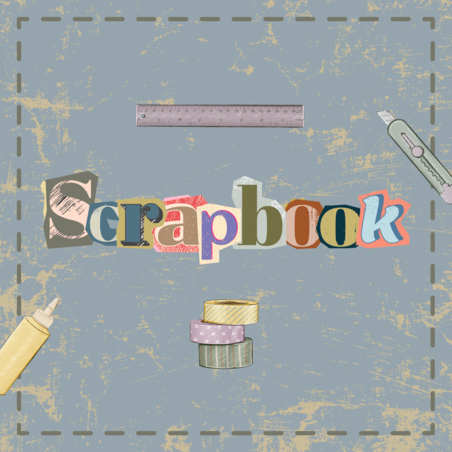
Scrapbooking: From the First Steps to the Unique Touch
Share
Scrapbooking is like a magical portal to a world full of colours and emotions. It offers unlimited possibilities for self-expression, techniques, and creativity. In this article we will present to you all the key steps that will help you create your first masterpiece.
Step 1: Inspiration
Like any other form of art, scrapbooking requires inspiration and muse. With YouTube and Pinterest you will immerse yourself in a sea of ideas and techniques and that will help you to unlock your imagination and enrich your knowledge.
On YouTube you will find hundreds of videos created by both professionals and scrapbooking enthusiasts. These videos will show you various techniques, color and texture combinations, and creative project ideas.
While YouTube assists you with the practical aspects of scrapbooking, Pinterest will spark your imagination and inspire you. There you will discover numerous images of scrapbooking projects. In short, Pinterest will give an answer to ‘’What?’’ while YouTube will teach you ‘’How?’’.
Step 2: Start with Cards
The best advice for all the beginner crafters is not to be discouraged by the appearance and complexity of large albums. Remember that the professionals were once beginners.
To start, we recommend choosing a small and easy project. Cards can be a wonderful way to learn basic techniques (cutting, attaching, composing), as well as skills like colour combining, design balance, using various decorative elements. This will allow you to familiarize yourself with the craft materials (paper sheets, ribbons, adhesives, decorations) and how they fit into your projects.
Start by acquiring materials. Imagine the look you want to achieve. If you’re struggling, use another project as inspiration, but don’t blindly copy it. Then indulge in a shopping therapy at some craft store.
While creating your cards, follow your inner voice. Don’t set limitations, be brave to experiment.
There are no rules in creativity, so just keep creating until you turn a plain sheet of paper into a work of art that reflects your uniqueness and style. This is the first step in mastering this beautiful art form.
Step 3: Communication
For every beginner creator it is important to have a place to exchange knowledge, ask questions, and communicate with people who share the same interests. Social networks come to the rescue here.
Facebook is not just a place to share your new photos or catch up on the latest gossips while drinking your morning coffee. The sooner you become a part of the scrapbooking community on Facebook, the easier your creative process will become for you. You will no longer need to waste time and rely solely on yourself to gather information from internet. In Facebook groups dedicated to scrapbooking, you will be able to communicate daily with other artists – beginners and professionals, to ask your questions, and seek advice. Participants in these groups are supportive and constantly share interesting materials related to new scrapbooking techniques and methods.
And here’s a useful tip from us – before posting a question, check if someone else has asked the same thing earlier. To do this, simply use the search function within the relevant group.
Step 4: Prioritize Quality
Quality is a key factor in scrapbooking and one of the main elements that will set your projects apart from most products on the market. Whether you are beginner or an experienced crafter, quality is the foundation upon which to build your creative success.
Start with the selection of good materials. Carefully select papers, cardstocks, adhesives, scissors, paints, and decorative elements. High-quality materials provide richer colours, better and sturdy textures, and long-lasting results.
Another thing you should not overlook is precision. There is no room for compromises in
scrapbooking, and attention to details is of utmost importance. Put all your efforts into careful cutting and adhering of the elements. Make sure that everything is in the right place and that there are no unwanted traces of glue or sticking.
Design and composition are also important. Experiment with different arrangements, element positioning, and play with symmetry and asymmetry. Do not hesitate to express your individuality and style through the design of your project.
Quality doesn’t just mean visual appeal and well-chosen materials. It also relates to the durability of your products. In the albums made by you, people will be storing memories of their most precious moments. Strive to create products that will stand the test of time. Use adhesives and tapes that are suitable for scrapbooking and ensure longevity.
Consider product safety. It is advisable to choose water-based adhesives since there products sometimes end up in the hands of children or people with allergies/intolerances to certain ingredients.
Step 5: Developing and Improving Your Skills
Once you have a solid foundation, it’s time to start expanding your knowledge, skills and style.
It’s essential not to stop experimenting, using and perfecting various techniques. Use a variety of materials and accessories. Add wooden elements, metal accents, or textile decorations. This will add extra depth to your projects. Use new tools and accessories to diversify the creative process and create something new and unique.
Don’t be afraid to create beyond the boundaries of traditional scrapbooking. Innovative approaches and fresh ideas will make you noticeable on the market.
Work in different styles – from vintage and rustic to modern and minimalistic – until you find the one that best expresses your individuality.
Remember that you always have a choice. When you work on a custom order, clients often request items for which it may be difficult to find materials (design paper, decorations, or other elements). If you don’t like the theme, tactfully suggest an alternative one similar to what the client wants. Do not hesitate to offer options because you know best what materials are available on the market and you have the experience needed to guide your clients with advice and suggestions.
Step 6: Make Your Own Creative Space
One of the important things for every artist is to feel comfortable in the environment where they work. It should inspire them and make them feel cosy, whether it’s a small table in the corner, a room, or an entire studio.
Start with decoration and arrangement. Choose a favourite colour scheme, images and objects that inspire you.
Strive for organization. Invest time in creating a system for storing your materials and tools. Boxes, envelopes, shelves, and racks can help you keep everything tidy and easily accessible.
Next, integrate technology into this creative process. Digital tools like computer and printer allow you to create personalized labels, decorations, and templates for your scrapbook projects. They also enable you to store and organize your photos and design projects.
Something not to forget is that paper absorbs and retains every smell, so it’s important to work away from cigarettes smell, cooking smell, and other similar odours.
Step 7: Share Your Creativity
There’s nothing that boosts your confidence quite like recognition from other artists. Share your creations with the rest of the scrapbooking community and the world. This will bring you satisfaction and make you feel proud, will motivate you even more, and will make you feel confident.
Just as other artists inspire you by sharing their works, you will become an inspiration for someone else.
Start by creating a blog, a website, or social media profile where you can share your projects and ideas. Don’t be afraid to share the entire creative process, not just the final result. People love to see how things are made, what techniques were used, and the sources of inspiration.
Be active in the virtual scrapbooking communities and forums. This will be beneficial not only for other people but for you as well, as it will enrich your techniques and knowledge. Participate in scrapbooking-related events and exhibitions, meet people, and share experience with each other.
When you’re ready to drop your products on the market, consider the following options:
-Facebook or your own online store
-Etsy – a globally renowned platform where you can sell your handmade items and scrapbooking products
-Amazon Handmade – if you want to reach a large audience and sell internationally
-eBay – this platform also offers the opportunity to sell handmade items and scrapbooking products
-Shopify – if you prefer to have your own online store, this platform provides integration with payment systems and web hosting
Take the time to explore and choose a platform that best aligns with your goals and target audience, and start offering your products there.
From here on, simply continue to create and improve. Sometimes you’ll feel like professionals, other times like beginners, especially when trying something new and unfamiliar. Regardless of the challenges, don’t stop! Focus on the satisfaction that scrapbooking brings you. Enjoy the process of creation because it can be therapeutic and inspiring.
Good luck!